ReliOn Prime Meter Manual: A Comprehensive Guide
This manual provides detailed instructions for the ReliOn Prime glucose meter, ensuring accurate blood glucose monitoring. It covers setup, testing, maintenance, and troubleshooting steps.
The ReliOn Prime blood glucose monitoring system is designed for easy and accurate self-testing at home. This meter empowers individuals to actively manage their diabetes by providing crucial insights into their blood glucose levels. Sold at Walmart, it offers an affordable solution without compromising on reliability;
Before using the ReliOn Prime, carefully read this manual to understand its features and proper operation. Familiarize yourself with the meter components and the testing procedure. Accurate results depend on following the instructions precisely. This guide will walk you through each step, from setting up the meter to interpreting your readings, ensuring confident and effective self-monitoring. Remember to always read all instructions and practice the test before relying on results.
Understanding Blood Glucose Monitoring
Blood glucose monitoring is a vital component of diabetes management, providing a snapshot of glucose levels at a specific moment. Regular testing helps individuals understand how food, exercise, and medication impact their blood sugar. The ReliOn Prime meter facilitates this process, enabling informed decisions about daily care.
Consistent monitoring allows for proactive adjustments to treatment plans, preventing both hyperglycemia (high blood sugar) and hypoglycemia (low blood sugar). Understanding target ranges, as determined by a healthcare professional, is crucial. Accurate testing technique, using only ReliOn Prime test strips, is paramount for reliable results. Never reuse a test strip, and always follow the instructions carefully to ensure accurate readings and effective diabetes control.
Meter Components and Overview
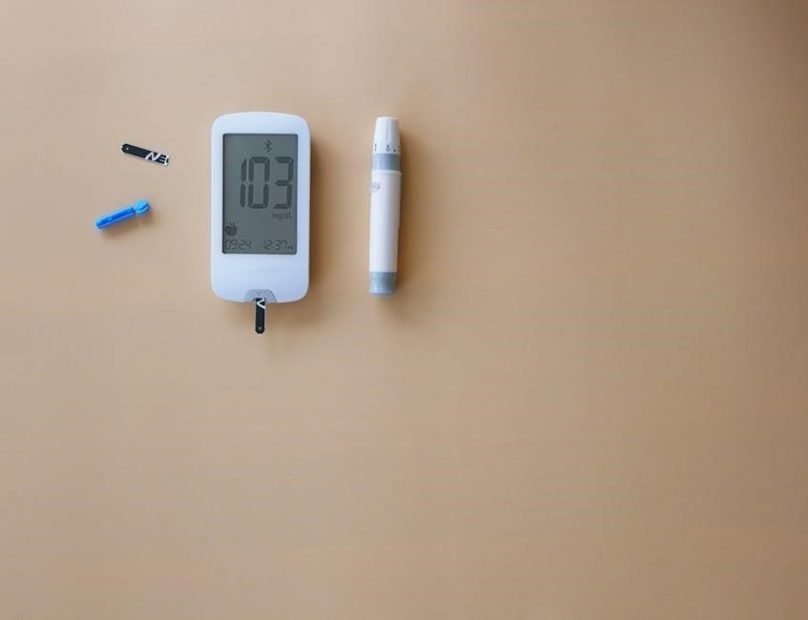
The ReliOn Prime Blood Glucose Meter kit includes several key components. These are the meter itself, a lancing device for obtaining blood samples, ReliOn Prime test strips (essential for accurate readings), and a battery to power the device. The meter features an On/Off button, a display screen for viewing results, and a port for data transfer.
The lancing device allows adjustable depth settings for personalized comfort. Familiarize yourself with the meter display, noting indicators for low battery, error messages, and test strip status. Proper understanding of each component ensures correct operation and reliable blood glucose measurements. Always use only designated ReliOn Prime test strips for optimal performance.

Setting Up Your ReliOn Prime Meter
Proper setup is crucial for accurate readings. This involves inserting a battery, setting the correct date and time, and understanding the meter’s display features.
Inserting the Battery
The ReliOn Prime meter utilizes a CR2032 battery for power, ensuring reliable operation. To install or replace the battery, locate the battery compartment, typically on the back of the meter. Gently slide the battery compartment cover in the direction indicated, usually with a small arrow or tab.
Insert a new CR2032 battery, observing the correct polarity – positive (+) and negative (-) sides. Ensure the battery snaps securely into place. Once the battery is properly positioned, carefully slide the battery compartment cover back onto the meter until it clicks shut.
A low battery indicator will appear on the meter’s display when the battery needs replacing. Replacing the battery will restore full functionality to your ReliOn Prime meter.
Setting the Date and Time
Accurate date and time settings are crucial for proper data tracking with your ReliOn Prime meter. To set the date and time, first ensure the meter is turned on. Navigate to the settings menu, typically accessed by pressing and holding the ‘Set’ or ‘Menu’ button.
Use the ‘Up’ and ‘Down’ buttons to adjust the year, month, and day, confirming each selection by pressing the ‘Set’ button. Repeat this process to set the hour and minute, ensuring AM or PM is correctly indicated.
Refer to pages 18-21 of the full manual for detailed step-by-step instructions. Once the date and time are correctly set, press the ‘On/Off’ button to save the changes and exit the settings menu.
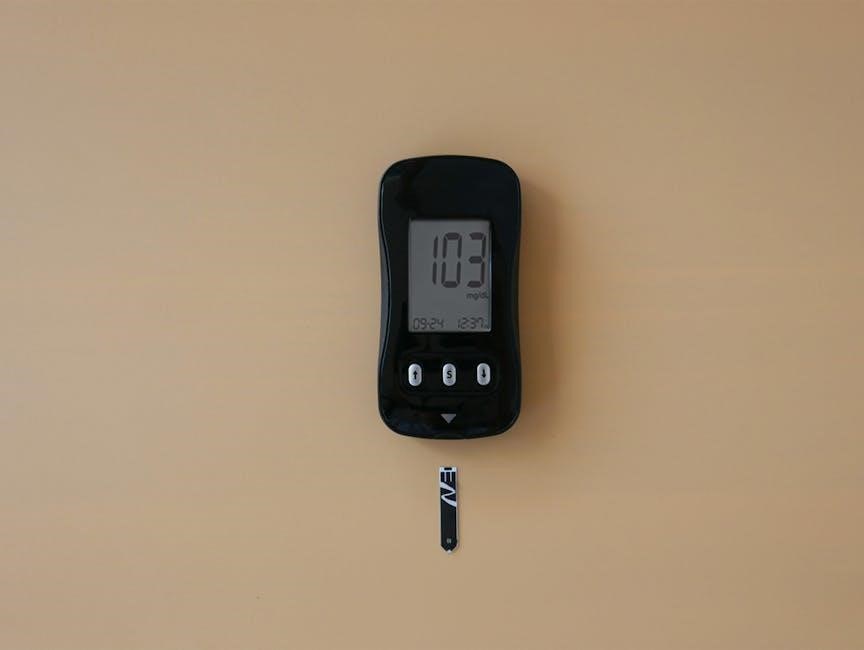
Understanding the Meter Display
The ReliOn Prime meter’s display provides essential information at a glance. The primary area shows your blood glucose reading in milligrams per deciliter (mg/dL). A smaller section displays the date and time, confirming accurate settings.
Symbols indicate meter status, such as a low battery warning or an error code. The test strip port icon confirms proper strip insertion. A memory icon shows if readings are stored in the meter’s memory.
Familiarize yourself with these icons to quickly interpret results and troubleshoot any issues; The display’s clarity ensures easy readability, aiding in effective blood glucose management. Refer to the manual for a complete list and explanation of all displayed symbols.

Performing a Blood Glucose Test
Accurate testing requires proper preparation of the lancing device, correct test strip application, and a sufficient blood sample for reliable glucose readings.
Preparing the Lancing Device
Before initiating a blood glucose test, proper preparation of the lancing device is crucial for a comfortable and accurate experience. Begin by removing the protective cap from a new sterile lancet. Insert the lancet firmly into the lancing device, twisting if necessary, until it clicks into place.
Adjust the depth setting on the lancing device according to your skin type; thinner skin requires a shallower setting. Test the device by pressing it against a firm surface to ensure it punctures correctly. Avoid reusing lancets, as this can cause pain and infection. Always use a fresh, sterile lancet for each test.
Ensure your hands are clean and dry before using the lancing device. Select a testing site, ideally on the side of your fingertip, avoiding areas with calluses or scars.
Applying a Test Strip
To begin the testing process, carefully remove a new ReliOn Prime test strip from its sealed container. Avoid touching the copper test area on the strip, as this can affect the results. Immediately insert the test strip into the meter’s test strip port, ensuring it’s fully seated and facing the correct direction – usually with the port label facing upwards.
The meter will typically power on automatically when a test strip is inserted, displaying a readiness symbol. If it doesn’t, turn the meter on manually. Verify the test strip lot number matches the coding on the test strip vial, if applicable.
The meter is now prepared to receive the blood sample. Ensure you apply the blood within the specified time frame, as indicated in the meter’s display, to avoid inaccurate readings.
Obtaining a Blood Sample
Prepare the lancing device with a fresh lancet. Select a comfortable puncture site, typically on the side of a fingertip. Clean the chosen area with an alcohol swab and allow it to dry completely. Position the lancing device firmly against the fingertip and press the release button to obtain a small blood droplet.
Gently massage the finger towards the puncture site to encourage blood flow, avoiding excessive squeezing which can dilute the sample. Bring the blood droplet to the test strip’s sample area, allowing it to be drawn in automatically.
Ensure a sufficient blood sample is applied; too little blood may result in an error message or inaccurate reading.
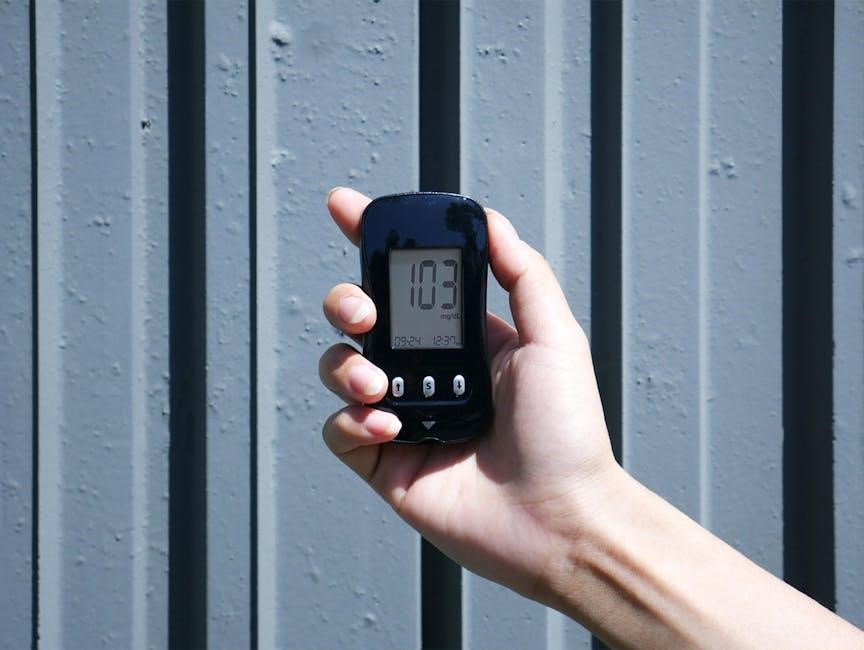
Reading Your Blood Glucose Result
After applying the blood sample, the ReliOn Prime meter will begin analyzing it automatically. The display will show a countdown, and within a few seconds, your blood glucose reading will appear. The result is displayed in milligrams per deciliter (mg/dL).
Carefully note the reading and compare it to your target range, as determined by your healthcare provider. The meter may also display indicators such as “HIGH” or “LOW” if the reading falls outside of the pre-set limits.
Record your results in a logbook or utilize the meter’s memory function for tracking purposes.

Understanding Your Results
Interpreting your blood glucose readings is crucial for effective diabetes management. Knowing target ranges and factors influencing levels empowers informed healthcare decisions.
Target Blood Glucose Ranges
Understanding ideal blood glucose levels is fundamental to managing your health effectively. Target ranges can vary based on individual factors, including age, overall health, and diabetes type. Generally, for individuals without diabetes, a fasting blood glucose level less than 100 mg/dL is considered normal.
For those with diabetes, the American Diabetes Association recommends target ranges of 80-130 mg/dL before meals and less than 180 mg/dL two hours after starting a meal. It’s important to discuss personalized target ranges with your healthcare provider. Regularly monitoring your levels with the ReliOn Prime meter and comparing them to these guidelines helps you and your doctor make informed decisions about your treatment plan, including medication adjustments and lifestyle modifications.
High and Low Blood Glucose Readings
Recognizing high and low blood glucose levels is crucial for prompt action. Hyperglycemia (high blood sugar), typically readings above 180 mg/dL, can cause increased thirst, frequent urination, and blurred vision. Hypoglycemia (low blood sugar), generally below 70 mg/dL, may result in shakiness, sweating, dizziness, and confusion.
The ReliOn Prime meter assists in identifying these situations. If a reading is consistently high or low, consult your healthcare provider. Immediate treatment for hypoglycemia involves consuming fast-acting carbohydrates, like glucose tablets or juice. For hyperglycemia, follow your doctor’s instructions, which may include adjusting medication or diet. Understanding these responses ensures effective diabetes management and prevents potential complications.
Factors Affecting Blood Glucose Levels
Numerous factors influence blood glucose readings beyond just food intake. Physical activity significantly impacts levels; exercise generally lowers blood sugar, while inactivity can raise it. Stress and illness can also elevate glucose, as the body releases hormones to combat these challenges.
Furthermore, hydration levels, medication dosages, and even the time of day play a role. Accurate record-keeping, alongside ReliOn Prime meter readings, helps identify patterns. Understanding these influences allows for better self-management and informed discussions with your healthcare provider. Consistent monitoring and awareness of these variables are key to maintaining stable blood glucose control.
Meter Maintenance and Care
Regular cleaning with a damp cloth ensures accuracy. Proper storage of the ReliOn Prime meter and test strips protects functionality and extends their lifespan.
Cleaning the Meter
Maintaining a clean meter is crucial for accurate readings and preventing the spread of infection. Before cleaning, always ensure the meter is turned off. Gently wipe the exterior of the ReliOn Prime meter with a slightly damp cloth. Avoid using harsh chemicals, abrasive cleaners, or excessive moisture, as these can damage the device.
Pay particular attention to the test strip port, ensuring no blood or debris remains. A cotton swab lightly moistened with water can be used for this purpose. Never immerse the meter in water or any other liquid. Allow the meter to air dry completely before inserting a new test strip or using it again. Regular cleaning, even after each use, contributes to the longevity and reliability of your ReliOn Prime meter.
Storing the Meter and Test Strips
Proper storage is essential for maintaining the accuracy and functionality of your ReliOn Prime meter and test strips. Store the meter in a clean, dry place, away from extreme temperatures and humidity. Avoid direct sunlight and areas prone to dust or spills.
Test strips are sensitive to environmental conditions. Keep them in their original container with the lid tightly closed. Do not transfer strips to another container. Store test strips in a cool, dry location, ideally between 60°F and 86°F (16°C and 30°C). Avoid storing test strips in the bathroom or near sources of heat or moisture. Always check the expiration date before use, as expired strips can yield inaccurate results.
Replacing the Battery
The ReliOn Prime meter utilizes a CR2032 battery for power. A low battery indicator will appear on the display, signaling the need for replacement. To replace the battery, gently remove the battery cover on the back of the meter. Carefully remove the old CR2032 battery, noting its polarity (+/-).
Insert a new CR2032 battery, ensuring the correct orientation (+/-) as indicated inside the battery compartment. Replace the battery cover securely. Incorrect battery insertion may damage the meter. After replacing the battery, you may need to reset the date and time. Dispose of the old battery responsibly, following local regulations for battery disposal.

Troubleshooting Common Issues
This section addresses frequent problems like error codes, meter failures, and inaccurate readings, offering solutions to ensure reliable blood glucose monitoring with your ReliOn Prime.
Error Codes and Their Meanings
The ReliOn Prime meter utilizes error codes to communicate potential issues during operation. Understanding these codes is crucial for effective troubleshooting. For instance, an “E1” error typically indicates a test strip issue – perhaps it’s damaged, inserted incorrectly, or expired. “E2” often signals insufficient blood sample, requiring a fresh test and a larger drop of blood.
“E3” can denote a problem with the meter’s internal circuitry, potentially needing a battery replacement or contacting customer support. Other codes might relate to temperature fluctuations or strip lot inconsistencies. Always refer to the complete list of error codes within the meter’s full manual for precise definitions and recommended actions. Ignoring error codes can lead to inaccurate results and compromised monitoring.

Meter Not Turning On
If your ReliOn Prime meter fails to power on, several factors could be at play. The most common cause is a depleted battery. Attempt replacing the CR2032 battery, ensuring correct polarity during installation. If a new battery doesn’t resolve the issue, inspect the battery compartment for any corrosion or debris that might be hindering contact.
Occasionally, the meter’s internal components may experience a temporary malfunction. Try pressing and holding the On/Off button for an extended period (around 10 seconds) to initiate a reset. If these steps prove unsuccessful, it’s advisable to contact ReliOn customer support for further assistance or potential meter replacement, as it may indicate a more significant hardware problem.
Inaccurate Readings
If you suspect inaccurate blood glucose readings from your ReliOn Prime meter, several factors require investigation. First, verify the test strips haven’t expired and are stored correctly – cool, dry place, away from direct sunlight. Ensure the test strip port is clean and free of debris. Confirm you’re using only ReliOn Prime test strips, as others are incompatible.
Proper testing technique is crucial. Insufficient blood sample size, applying too much or too little pressure, or contamination can all affect results. Repeat the test with a fresh strip and ensure adequate blood application. If inconsistencies persist, contact ReliOn customer support; the meter itself might need calibration or replacement.
ReliOn Prime Test Strips
Utilize only ReliOn Prime test strips with your meter for accurate results. Proper storage and attention to expiration dates are essential for reliable readings.
Using ReliOn Prime Test Strips
To ensure accurate blood glucose monitoring, always use ReliOn Prime test strips specifically designed for compatibility with your ReliOn Prime meter; Carefully remove a test strip from the vial, avoiding touching the copper test area. Immediately insert the strip into the meter’s test strip port, ensuring the correct orientation as indicated by the strip and meter markings;
The meter will automatically turn on and display a readiness symbol, indicating it’s prepared to receive the blood sample. Do not reuse test strips, as this can lead to inaccurate results. Each strip is intended for single use only. Always check the expiration date on the vial before use, as expired strips may yield unreliable readings. Proper strip usage is crucial for effective diabetes management.
Test Strip Storage Guidelines
Proper storage of ReliOn Prime test strips is vital for maintaining their accuracy and reliability. Always store the strips in their original vial, tightly closed to protect them from moisture, heat, and light. Avoid storing strips in direct sunlight or in humid environments like bathrooms.
Ideal storage temperature is between 60°F and 86°F (16°C and 30°C). Do not refrigerate or freeze the test strips. Keep the vial away from potential contaminants. Inspect the strips before each use; discard any that appear damaged or discolored. Following these guidelines ensures optimal performance and accurate blood glucose readings, contributing to effective diabetes self-management.
Expiration Dates and Accuracy
Always check the expiration date printed on the ReliOn Prime test strip vial before each use. Using expired test strips can lead to inaccurate blood glucose readings, potentially causing incorrect treatment decisions. Discard any strips past their expiration date immediately.
Accuracy is paramount for effective diabetes management. Even within the expiration date, opened vials have a limited shelf life; use them within three months. Ensure the vial is tightly sealed after each use to minimize exposure to air and moisture. If you suspect a strip is faulty, do not use it and obtain a new one. Consistent adherence to these guidelines ensures reliable results.

Advanced Features

The ReliOn Prime meter offers memory recall, averaging functions, and data port capabilities for comprehensive tracking and analysis of your blood glucose levels.
Memory Recall
The ReliOn Prime meter conveniently stores your previous blood glucose readings, allowing you to review your testing history. This feature is invaluable for identifying trends and patterns in your glucose levels over time. To access the memory recall function, typically you’ll need to press and hold the memory button, or navigate through the meter’s menu using the on/off button.
The meter displays the date and time each reading was taken, providing context for your results. You can scroll through your stored readings to compare current levels with past measurements. This historical data assists in understanding how diet, exercise, and medication impact your blood glucose control. Regularly reviewing your memory recall data empowers you to make informed decisions about your diabetes management plan, in consultation with your healthcare provider.
Averaging Function
The ReliOn Prime meter offers an averaging function, a helpful tool for gaining a broader perspective on your blood glucose control. This feature calculates the average of your readings over a specified period, typically 7, 14, or 30 days. Accessing this function usually involves navigating the meter’s menu using the on/off button until you reach the averaging option.
The average reading provides a smoother representation of your glucose levels, minimizing the impact of single high or low values. It’s a valuable metric for assessing the overall effectiveness of your diabetes management plan. However, remember that an average doesn’t reveal fluctuations, so it’s crucial to also review individual readings. Discuss your average glucose levels with your healthcare provider to adjust your treatment as needed.
Data Port Functionality
The ReliOn Prime meter incorporates a data port, typically a micro-USB port, enabling data transfer to a computer for detailed analysis and record-keeping. This functionality allows you to download your blood glucose readings, date, and time stamps, facilitating comprehensive tracking of your diabetes management.
To utilize the data port, you’ll generally need to connect the meter to your computer using a compatible USB cable (often sold separately). Specific software may be required to download and interpret the data; check the ReliOn website for compatible programs. This downloaded data can be invaluable for identifying trends, sharing information with your healthcare provider, and making informed decisions about your treatment plan. Regular data downloads contribute to proactive diabetes care.